Saturday, August 27, 2011

Freezing Baby Food


I also wanted to recommend this great freezer container for freezing portion sizes of your baby food. It is great because it has a lid, it freezes it in portion sizes, and the frozen food pops out easily. They are made by Beaba and can be found at Williams-Sonoma. It may seem a little pricey at $24.95 per tray, but I think it's worth it. And you can just get one, that's what I did, and after the food freezes, I remove it and place them in ziploc freezer bags so that I can freeze more food. It comes in a bunch of cute colors too!


Chelsea's Baby Food, Inc., Continued

5. Throw the carrots in your blender.

6. Blend on low. Gradually add the leftover water you used for steaming to thin it out until you get a smooth consistency.


7. The one bag of carrots made all of this food. I was able to put some in the fridge and freeze the rest. This is great for saving time later. If you work, you could make a bunch of food one weekend, freeze it all, and be set for a month!


8. Now you have a beautiful, fresh, and healthy meal for you sweet baby!

I recommend removing all clothing (saves you from doing extra laundry). Jack loved his carrots!

I will post more as I experiment with different foods and stages of eating. So far it has been so much fun. I really enjoy doing this for Jack, and it is saving us a lot of money!

Chelsea's Baby Food, Inc.

A few years ago, if you would have mentioned making homemade baby food, I would have told you that is ridiculous. Why spend so much time and effort when you can buy it so easily at the store? Well, after some reading, I realized it actually is not that difficult, it's way cheaper, and it is very healthy!

I have a few different books that have been very helpful in this process. One is Organic Baby & Toddler Cookbook by Lizzie Vann. My favorite thing in this book is that it gives a schedule for feeding from weaning to four years. It is really helpful as I am slowly introducing Jack to solids and gradually weaning from breastmilk. The other book I have really enjoyed is Start Fresh by Tyler Florence. As you are probably aware, I am a bit of a Food Network junkie, so when I found out one of there chefs wrote a baby cookbook I was really excited. His recipes are really great, and I appreciate how much he wants to introduce children to fresh fruits and vegetables and great flavor combinations at such a young age. I have other cookbooks that have also been helpful, but just thought I would mention those two.

There are many different options when cooking fruits and vegetables for baby food, but from what I read, it seems that steaming is the best, because it allows the food to retain most of its nutrients. This is what Tyler Florence recommends in his book, at least for the first foods. So, this is the route I took, and it was so easy. He also recommends using a blender rather than a food processor to make the food as smooth as possible, so I have been doing that.

So, here are the simple steps to making delicious baby food:

1. Make sure your sous chef is nearby.

2. Choose from a variety of fruits and vegetables for your little one. I started with carrots. This bag of organic carrots was only $.79! That comes out to less than $.10 per serving for organic baby food! Since then I have also cooked sweet potatoes, zucchini, peas, and pears. Jack seemed to like all of them except the zucchini.

3. Peel carrots. Your sink might look a little disastrous afterward. But just be thankful you don't have a hideous brown 1980s era sink like me (and if you do, I am sorry).


4. Place beautiful carrots on cutting board and slice.

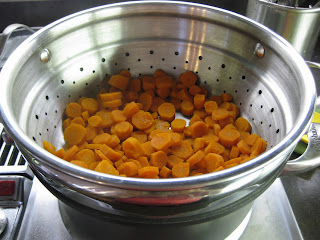
4. Fill a large pot with water, place a steamer insert in it (this one came with this pot, but I think you can buy one if you don't already have one), cover, and bring to a boil. Add carrots, and cover again. Steam until carrots are soft, about 10 minutes.

Continued on next post...

Wednesday, August 24, 2011

Easy Shrimp Pasta


During my "cook with what you've got" phase, I was pleased when I found a bag of frozen shrimp in the freezer with a few shrimp left. So I cooked the shrimp in pan with a jar of marinara, minced garlic, and crushed red pepper. I made angel hair pasta, then threw the cooked pasta in the pan with the sauce and stirred it around. I then topped each pasta dish with shredded Italian cheese. This was a very easy dish to make, and pretty tasty!

Friday, August 12, 2011

Cook With What You've Got


Lately we have been a little tight with our budget as Josh was studying for the bar and we are transitioning with the move and everything. So I have been trying to create meals with things I had in the kitchen and not buy too many groceries. I was assuming this would mean we would be going vegetarian for awhile since meat can get expensive and isn't necessary. I was fine with a diet sans meat, but one day I looked in my freezer and found salmon. I was so excited (silly, I know), so I made baked curry salmon with peas and Mediterranean Curry Couscous. The couscous was from a box, it is the Near East brand. I had bought it awhile back when it was on sale at Whole Foods, I think it was about $1, so not bad. The peas were frozen peas in a steam in bag package, so easy. For the salmon, I wanted it to have a similar flavor to the couscous, so I melted butter in a dish, sprinkled a dash of curry powder in it and mixed in a clove of minced garlic and a little salt and pepper. I placed the salmon in a baking dish, poured the butter mixture over it, and baked it at 450 degree for about 12 minutes. The flavor with the curry butter sauce was delicious, but I think the salmon wasn't all that great. I think it was because I used a cheaper salmon. My new resolution is to buy all seafood and meat fresh from Whole Foods instead of getting frozen seafood and other meats from cheaper places. I think it will be worth the splurge. And I will just get most of my other ingredients from the less expensive stores.


Another dish I tried was this ravioli. I had bought sun dried tomato and goat cheese ravioli at Trader Joe's, so I spruced up the dish by cooking the ravioli, then putting it in a pan over medium heat with baby spinach, olive oil, and salt and pepper. I mixed it until the spinach was wilted. After putting it in our dishes I sprinkled a little parmesan cheese on top. It was pretty good, but I don't know that the ravioli was worth the cost. I am pretty sure a less expensive pasta would have been just as good, just add a little goat cheese and sun dried tomato too if you want those flavors.

Wednesday, August 10, 2011

First Attempt at Tikka Masala


Are any of you fans of the show Next Food Network Star? I really love it, and I recently caught up on last season thanks to Hulu. My favorite contestant throughout the season was Aarti. She always had amazing food, and she had such a sweet, bubbly personality. She is a food blogger (although she writes about other subjects as well), and her blog is really fun. She is a strong Christian, and is not afraid to write about her faith. I was very excited when she won her own show on Food Network. Her show is called Aarti Party. She makes the most amazing looking dishes, many of which I plan to test in my kitchen.

As I have mentioned before, I absolutely love Indian food, especially Chicken Tikka Masala. I always thought I would love to find a good recipe for it and make it at home. So I was very excited when I found Aarti's recipe for Chicken Tikka Masala. The recipe was not too difficult to make, although there were some ingredients that were a little more difficult to find. For instance, garam masala, which is a spice blend, is not available at all grocery stores. I found it at World Market. The dish was very good, but I may want to tweak it a little more next time to add a little more flavor and spice. I used two serrano peppers, but next time I might use three or leave the seeds in since we like it spicier. Overall, it was good and I will try it again. I served it over rice with naan on the side...yum!


With our leftover naan and leftover zucchini I had, I made these delicious naan pizzas. Place a piece of naan on a pan, drizzle with olive oil, spread marinara sauce over it, and cover with thinly sliced zucchini and mozzarella. Bake at 400 degrees until cheese is nice and bubbly. This was so good, and I made it everyday until I ran out of naan! It makes a great meal served with a salad, or could be a fun appetizer for a party if you sliced it into strips. By the way, if you are wondering where to find naan, you can usually find it at most grocery stores. I found great naan at Trader Joe's here in Albuquerque. They had plain and garlic, both of which were delicious!

Tuesday, July 12, 2011

New Mexico Sunset


I took this picture tonight when I went for a walk in our neighborhood. Isn't it beautiful? I love where we live! I will definitely be sharing more pictures soon!

Sunday, July 10, 2011

A Few More Originals...

Here are a few more of my original recipes. Above I made Fried Zucchini with a Sriracha Ranch Dressing. I bought a bunch of zucchini at the store the other day, more than I needed, so for a snack one day I decided homemade fried zucchini would be great, and it was! Here is how you can make it:

  • Slice zucchini in thin discs (I used the slicer on my food processor, and it worked great).
  • Set up a breading assembly line with 3 bowls. In the first place flour seasoned with a little paprika and any other seasonings you like. In the next bowl, beat 2 eggs, and in the final bowl, place panko breadcrumbs. These are Japanese breadcrumbs you should be able to find at any grocery store.
  • On the stove, fill a pot with canola oil and heat to medium high. Make sure the oil is nice and hot before frying.
  • Take sliced zucchini, dip in flour, shake off excess, dip in egg, making sure all of the zucchini is covered, then dredge in breadcrumbs. Make sure you do this in small batches. Drop zucchini in oil, and let fry for 2-4 minutes or until golden brown. Place on a plate lined with a paper towel to soak up excess oil. Sprinkle salt and paprika over fried zucchini.
  • For the Sriracha Ranch, pour Ranch dressing in a bowl (I use Light Ranch, tastes the same and isn't quite as bad for you), then pour Sriracha in the ranch and stir it in. Just add a little at a time, tasting to figure out when you get to the spice level you prefer.
This was really good! I made it again the next day for Josh, and he loved it. Would be fun for a party too.
I had hot dogs for lunch on the 4th of July, and made them a little differently. I thought this technique was good because it made the bun crispy and melted the cheese well. You just boil or grill the hot dog as you normally would. While doing that, butter the buns and place them in a 350 degree oven. Once the hot dogs are ready, take the buns out, place the hot dogs in them, then cover them with diced green chile (very delicious), and cover with a slice of cheddar. Place them back in the oven and keep an eye on them. Once cheese is melted, remove from oven and cover with any other condiments you like.


I made these Red Chile Chicken Enchiladas the other day, and they were pretty tasty too. I poured one jar of Cervantes Red Chile Sauce (made in Albuquerque!) and one can of cream of chicken soup in a pan with 2 chicken breasts cut into cubes. I cooked them on medium heat until chicken cooked through then let it simmer a while. Next I heated up flour tortillas (you could use corn tortillas if you prefer) in the microwave for about 30 seconds then poured a little chicken and sauce mixture into each tortilla, rolled them up, and placed them in a greased baking dish. Make sure you put all of the chicken in the tortillas. Pour the remaining sauce over the top of the enchiladas and cover with shredded Mexican cheese. Bake in oven at 400 degrees until cheese is nice and bubbly (can't remember how long this took, maybe 10 minutes?). I served mine with an egg over easy on top and sour cream. I would have served rice and beans for the sides, but didn't have any, so just used tortilla chips instead!

New Recipes

Taking a little break from the recap posts to share pictures and recipes of things I have cooked lately. Above is an improv meal I made one night with ingredients we had around the house. It is a Cajun Chicken Sandwich with fries. I seasoned the chicken with Tony Chachere's Creole Seasoning, and I think that was it. I sliced some jalapenos and sauteed them in a pan, once they were done, I removed them and cooked the chicken breasts in the same pan. When the chicken was cooked through, I placed them on a bun I had toasted with garlic butter. I covered the chicken with cheese and the jalapenos and served them with french fries. I found these frozen fries at Whole Foods and seasoned them with Tony Chachere's as well and topped them with the leftover jalapenos. I made a Creole Mayo I had seen in a recent issue of Cooking Light. You can find the recipe here (it goes with a shrimp recipe they had). We both loved this meal, and I will definitely do it again!

I made this Summer Squash, Bacon, and Mozzarella Quiche from another recipe in the recent issue of Cooking Light. Josh loved it (he is a huge fan of quiche), and I thought it was pretty good (I am not as big of a quiche fan in general). It was pretty easy to make, and pretty healthy as well.

Friday, July 8, 2011

New Mama

This is a picture of one of the happiest moments of my life (I know I am not looking my best, but that is beside the point). Here I am holding my son Jack just moments after he was born with my wonderful husband and my sweet mom.

I have always wanted to be a mom for as long as I can remember, however, I was not in too big of a hurry to make it happen. A little over a year ago, Josh and I decided after almost three years of marriage that we were ready to start trying to have a baby. I was thrilled when we found out we were pregnant last June. God had given us a gift we did not deserve. Pregnancy for me was good. I felt pretty good throughout most of it, I only got sick a few times, and felt pretty comfortable and energetic for the most part (until about the last month). I enjoyed being pregnant. Some women absolutely hate it, others love it, even preferring it over not being pregnant. I would say I fall in the middle of the two extremes. I enjoyed feeling my son moving inside of me, seeing my stomach grow as he did, and anticipating what was to come (and I am not going to lie, I even kind of enjoyed all the attention). I did not enjoy the nausea (especially since I was in D.C. for most of that period, which you can read about in my posts from last summer), I did not enjoy gaining 50 pounds (especially in undesirable places like my rear end and thighs), and I especially did not enjoy the constant heartburn that kept me up most nights.

During pregnancy I talked to other moms and read all about giving birth. It is so nice to have the internet and be able to research and have a better understanding of what you are about to go through. Now I can't imagine how women did it before! Although those things helped prepare me, nothing could truly prepare me for the experience of having a child. There is absolutely nothing like it on this earth. I know every mom says that, but it's true.

Here is the basic rundown of my experience giving birth. This is the abbreviated version, even though it may seem long. Just know I could have gone much longer. I began having contractions at about 11:00 the night before Jack was born. I always wondered how I would know if they were the real thing, but after timing them for a few hours and feeling them get progressively worse, I had a feeling it was the real deal. We called the doctor and went up to the hospital around 4 a.m. (I think, but my memory is fading). When I arrived, they put us in a little room to monitor the contractions and check to see if I was dilated. We stayed in there for about an hour or two. I did not enjoy that time at all. I was in pain, I was tired, the room was dark, and the hospital floor seemed eerily quiet. Needless to say, I was very happy when they told us they would be moving us to the Labor and Delivery room, which was much bigger and very nice. I got an epidural around 9 or 10 that morning, and it made a world of difference. I am so glad I did it. I know some people are very opinionated one way or the other about the whole epidural thing, and I think it is completely up to the mom, but I will say I had a great experience with it. I was glad I did it for many reasons, but one of the main reasons was that I was able to sleep for about an hour or two afterward since I was no longer feeling the contractions. Josh was able to sleep too, and we both agree that was a great thing so that we were well rested for the delivery.

I think I began to push around 12:00, but once again, my memory is fuzzy. For some reason, I didn't realize how long I would have to push. I figured this would take about 30 minutes (I guess I missed this part in all of the online articles I read...hmm). Well, it took much longer (another reason I am thankful for the epidural). Without it I don't know if I would have had the strength to keep pushing. Plus it was really wonderful not to feel any pain! Jack finally arrived at 3:14. There is no way to accurately describe the moment he arrived. I was completely overwhelmed with joy. They gave him to me right away and tears of joy were streaming down my face. It was incredible. It was also amazing to share that moment with Josh. We both agree it was the best day of our lives (even better than our wedding!). My mom was in the room too, and it was so special to share that experience with her. My dad and Josh's parents were in Lubbock too, and soon after they were able to come in and meet Jack. What a blessing for Josh and I to have such wonderful parents to celebrate this moment of our lives with!

Next time I will write about the first few months of motherhood, but now it is time for bed!

New Look, New Name, Not Quite the Same...

Well, it has definitely been awhile since I have written. Life has been a little busy. We had our baby in March, in May Josh graduated from law school, I finished work, and we moved to Albuquerque. If you are going to have some big changes in life, you might as well have them all at once, right?

The birth of our son Jack was amazing, and I am loving being a mom (more on that some other time). The first few months of adjusting to motherhood, then moving to a new city kept me very busy and distracted. Not until recently did I begin cooking again on a regular basis and feeling like I wanted to start writing again. As I thought about coming back to blogging I debated whether I should continue to write primarily about food, or if I should expand the blog to cover more things I am interested in. After a little thought, I chose the latter. Why not right about all of the things I find interesting rather than just one? I know most people have stopped checking my blog at this point, and there probably were not too many people reading it to begin with, but even if no one reads it, I think I will enjoy getting back into the practice of writing on a regular basis. It's just fun. I think as a stay at home mom it is good for me to have a hobby like this too.

So, all that to say, I am changing things up a bit. I will be writing about the things I enjoy most, and those things which I find myself doing most often. That will include cooking (and anything to do with food), design (especially as I am decorating our new place), being a mom (this is the topic that will probably come up the most), travel, and the outdoors. Of course, there will most likely be other topics that will creep in here and there, and some that may end up creeping in a lot. So we will see where things go.

In the next few posts, I want to just talk about all of the things that have happened in my life over the past four months. So, enjoy!

Friday, February 4, 2011

Easy Curry


My friend Emily shared this easy and delicious meal idea with me. Cook cut up chicken breasts (or whatever meat you have around) in a pan with this yellow curry paste (you can find it at Asian Grocery Stores), and a can of coconut milk (you can find this at Asian Grocery Stores or most upscale grocery stores or World Market). Add any vegetables you have on hand too. When I made it this time I used frozen peas and corn. Cook until meat is cooked through. I usually cook it on medium until the sauce is bubbly then turn it down to low and cook for about 20 minutes or however long it takes for the chicken to cook. You can also do it in a slow cooker, but I don't know about the times for that. Serve over rice.

This meal is so simple, and very delicious (it has a nice spicy kick too)! I have started stocking up on the coconut milk and the curry paste at the Asian Grocery store, and I usually have rice, chicken, and some vegetables around, so it is a great last minute meal!

Lemon Poppy Seed Waffles

I found this recipe for Lemon Poppy Seed Waffles in a recent issue of Southern Living. They are pretty easy to make and taste very good. They have a nice, light texture. The recipe recommends topping with a blackberry and syrup mixture, but I used blueberries. I had some frozen ones in my freezer and just thawed them out. They tasted good with the waffles too! You can find the recipe here.

Healthy Dinner


Okay, so I know it's been forever. Pregnancy and busyness have caused me to not cook as often, and when I do it is usually something really simple and boring. But I have had a few good meals here and there, so I thought I would catch up and share some of them.

I probably cooked this a month or two ago, but it was good, so I figured I would share. I baked salmon fillets in a lemon and garlic butter sauce, but they didn't taste that great. Although, I am going to blame that on the fish, not my cooking. They didn't have any wild salmon at the store when I bought it, so I had to go with farm raised and it just did not taste as good. Even though the salmon was not a huge hit, I did make one of my favorite salads. Just top spinach leaves with some chopped hard boiled eggs and crumbled bacon. It is so easy, and really delicious. I used Annie's Naturals Lite Honey Mustard Vinaigrette Dressing with it, which was really tasty as well.