Friday, December 28, 2012

Christmas Goodies

I love giving (and receiving) tasty treats around the holidays. Growing up, my mom would often make peppermint bark to hand out to friends, teachers, and neighbors. It is so simple to make, delicious, and pretty!

To make it, you will need one package of almond bark (also called vanilla-flavored candy coating). This can be found in the baking section of the grocery store, near chocolate chips. You will also need one bag (I think the one I used was 10 oz.) of peppermints. Begin by removing peppermints from wrappers and placing them in a large zip top bag. Using a meat mallet, hammer, or heavy rolling pin, crush the peppermints (while in the bag). Next, place almond bark in a large microwave safe bowl. Cook in microwave for 2 minutes, stir, then continue this process until it is completely melted. Pour crushed peppermints into bowl and stir. Line a large baking sheet with parchment paper or wax paper. Pour bark mixture into pan and spread out with a spatula. Let sit for a few hours or until completely dry. Brake apart into small pieces and enjoy!
Another Christmas favorite of mine is Chex Mix (well, I enjoy it all year, but Christmas is yet another excuse to eat it). I follow the Original Chex Party Mix Recipe and make changes as needed. For instance, I usually do not add bagel chips because they can be difficult to find in larger quantities and a little expensive. I also like to substitute cashews for the mixed nuts, but this year I refrained from using nuts at all. My son and some of our friends have peanut allergies, and other nuts can often trigger them. So. I just used the 3 different types of Chex cereal and pretzel sticks. I followed the recipe for everything else.
It's so good! And it also makes great road trip food for yourself or friends that may be traveling over the holidays.

Tuesday, December 18, 2012

Tortilla Soup


I made my grandmother's chicken tortilla soup again on Sunday. It's so warm and comforting on a cold day. I changed it up a little this time. I decided to make it after church on Sunday, so we ran to the store on our way home and I did not bring a list which led to me forgetting the fresh tomatoes. So instead of fresh tomato juice I used canned tomato sauce (one 8 oz. can), and rather than a fresh tomato, I used one can of diced tomatoes and green chiles (undrained). I also used about 1/3 of a carton of chicken broth (rather than an entire carton) because it was all I had left and the liquid from the can of tomatoes and green chiles made up for it.

This modified version was still delicious and a little spicier with the addition of the diced tomatoes and green chiles. I used Rotel original, which is medium spicy, but you can buy mild and only use one jalapeno in the soup if you are not a big fan of spicy food.

Easy Pancakes

On Sunday morning we woke up to a beautiful blanket of snow at our house. I love it when it snows here. The mountains look gorgeous and nothing is cooler than snow in the desert! I took this picture with our iPad through the window and managed to catch a little reflection. This was not my attempt at artistic photography in case you were wondering. 


Inspired by the beautiful morning, I decided to make pancakes. I use to think you only made pancakes with box mix because homemade would be too much work. Now I know that making pancakes from scratch can be very simple. Plus, the ingredients are things you most likely have around your kitchen anyway. I just searched pancake recipes on the Food Network website and found this recipe.  The only ingredient I was missing was nutmeg, so I sprinkled in a little cinnamon instead. It would be just as good without either as well. 

These pancakes were very good, especially for something that can easily be thrown together at the last minute. You could also add to it like throwing in blueberries or mashed bananas. This is definitely something I will make again. 

My favorite pancake recipe is another Food Network one from Tyler Florence, his Ricotta Pancakes. But they are a little more time consuming and require ingredients you may not have on hand. So, they are my "special occasion" pancakes.

I have a feeling this pancake recipe will be one I will return to often, especially on those mornings (or evenings) when I can't figure out what to make! And by the way, Jack loved them. It's a perfect toddler breakfast. I didn't give him any syrup or butter. I figure I will keep those away from him until he's old enough to ask for it. If he's happy without the extra sugar and fat that's just fine with me (If only I was content to eat them that way)! 


Lemon Chicken Piccata


This past weekend my brother and his friend stayed the night with us on their way out to Utah. I love getting to see my younger brother, even if it is only for a short period of time! So, like any good big sister, I knew I needed to cook them a good meal.

I decided to go with one of my favorites, another Cooking Light recipe, this Meyer Lemon Chicken Piccata. I have made this many times and it is always good. Josh and I both love it. And for the most part, I can keep the ingredients on hand and make it almost any night. I like to serve it with angel hair pasta or thin spaghetti noodles. I pour the sauce over both the chicken and the pasta.

One of my favorite veggies to make with it is roasted asparagus. Trim the ends off your asparagus, place on a baking sheet, drizzle with olive oil and sprinkle with salt and pepper. Bake at 375 degrees for about 15 minutes.

This is a great easy and light meal for any night!

Monday, December 17, 2012

Christmas Party


On Friday I hosted a Christmas party for my neighborhood play group. I love hosting. I always have plenty of ideas of things I would like to cook, cute decorations, activities, etc. However, I rarely end up turning many of those ideas into a reality. Thankfully, my friends are sweet and don't expect perfection.

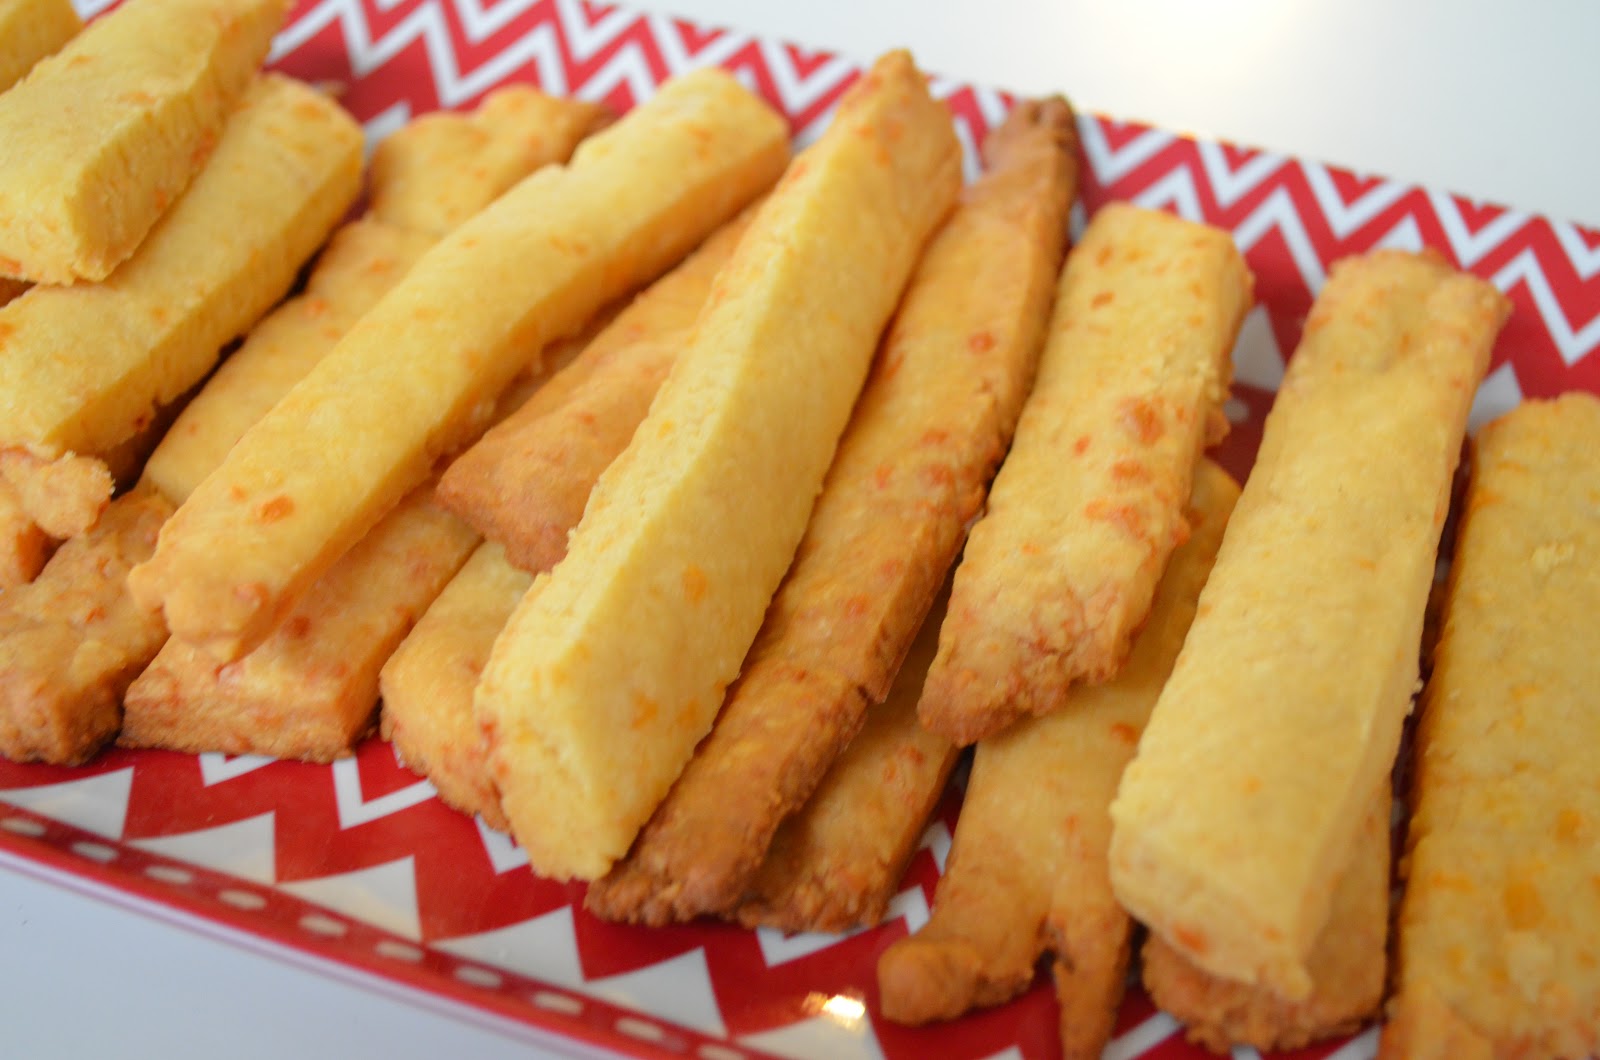
This month's issue of Southern Living included a recipe for a basic cheese straw dough along with multiple variations. I thought I might make this to give to friends, but did not have my act together quite well enough for that. So, I figured I'd throw it together the day of the party to include with the snacks. Since this was my first time making it and also because I didn't feel like running to the store to find more ingredients, I just made the basic cheese straws. I also do not have any cookie cutters or a pastry wheel, so I just cut it into strips (not as fun and festive, but still delicious). These were really good, and super easy to make. I will definitely make them again and try the different variations! 
  
I also decided to make chocolate dipped candy canes. This is something very easy to do. Buy chocolate flavored almond bark (in the baking section of the grocery store usually near chocolate chips). Empty chocolate into large microwave safe bowl. Heat for about 1-2 minutes, stir, and repeat until completely melted. Remove candy canes from their wrappers. Lay out wax paper or parchment paper on your counter. Dip candy canes into melted chocolate then place on parchment paper. Leave out until chocolate hardens (about 2 hours).


After I dipped all the candy canes, I still had a lot of leftover chocolate. And you can't let chocolate go to waste. So I began looking around my kitchen for other things to dip in chocolate. Pretzels and orange slices were the winners. Both delicious. The oranges I put on a plate in the fridge instead of out on the counter to allow the chocolate to harden. 


We had a special holiday cocktail for all the moms. It helps us handle all the screaming toddlers with ease! A few years back we came across a recipe for this Grey Goose Peppermint Froth. We have made it every Christmas since then, so I thought it would be great for my party. We added my chocolate dipped candy canes for garnish. It's like Christmas in a cup.

Sunday, December 16, 2012

"Freezer" Dinner


Some nights it's difficult to find the energy to get a meal together, but I want something more than frozen pizza or take out. This week I put together a meal that takes almost no time to prepare, and all the elements can be stored in the freezer or fridge and will be ready to cook.

When my mom showed me Hormel pre-seasoned pork tenderloin and I saw how easy it was to cook, I knew I would have to give it a try. These come in a variety of flavors, and could not be easier to prepare. You simply remove them from the package, through them on a baking sheet and into the oven. They are a little pricey on their own, but my grocery store often does buy one get one free sales on these, plus I have found coupons for them on occasion, so combine that and you have a great deal! They can also be frozen in their package, so you can stock up on them when they are on sale.

In addition to our pork the other night, I pulled peas out of our freezer and garlic toast. This may not be the healthiest, prettiest, or freshest meal, but it was semi-homemade and easy!

Gorgonzola Grits

As I have mentioned before, I am a big fan of Cooking Light magazine. While perusing this month's issue, I came across this recipe for Skirt Steak with Gorgonzola Polenta. I thought I would give it a try because it is something different from what I normally cook yet still not too difficult. I could not find skirt steak at the grocery store and didn't have the time, energy, or desire to go to another store with a toddler, so I settled for flank steak, which I believed to be similar.

Well, the steak was not exactly a home run. It wasn't terrible, it was just a little tough, and after doing a little online research just now, I discovered that flank steak is generally a tougher cut of beef. The sauce, however, was pretty tasty, although a bit sweet for my personal taste (maybe if I left out the honey it might be better).

I gave the dish a southern spin by replacing the polenta with my own version of gorgonzola grits. I cooked instant grits according to the package directions, replacing the water with low sodium chicken broth. Once the grits were cooked, I stirred in about 1/4 cup of crumbled gorgonzola cheese. It melts into the grits giving them a creamy texture and a wonderful flavor. If you are unfamiliar with gorgonzola, it is an Italian blue cheese. So, if you don't like blue cheese, you may not like this. I don't eat blue cheese much on its own, but in a dish like this I enjoy it.

I also sauteed some fresh baby spinach in a little olive oil with salt and pepper. I placed this on top of the grits and they tasted great together. I will definitely be making these grits again. They would be great on their own, with crumbled bacon mixed in, or with another steak dish.

Saturday, December 15, 2012

Juice, Toddler Food & Ranch Dinner


We are still trying to juice some, mostly in the mornings. The other day I used this combination of carrots, oranges, and spring mix/baby spinach. Pretty tasty! 


Preparing meals for toddlers can be difficult, and I often find myself in a rut of mac and cheese and grilled cheese. So, when I am a little more nutritionally minded, one of my favorite meals to cook for Jack is sauteed sweet potatoes. Just peel and chop sweet potatoes into bite size pieces then place in a bowl. Drizzle them with a little canola oil (or whatever oil you have on hand). I like to add chili powder and cumin and toss the potatoes around. Then saute them in a pan over medium high heat until they are a little crisp on the outside and soft on the inside. Jack loves these and sometimes I serve them alone, or as I did above, with black beans.

This dinner is not pretty. Looks a little too monochromatic for me, but our broccoli went bad and I didn't have anything pretty to garnish it with. However, it was pretty tasty. The chicken, not so much, so I will spare you the details, but the potatoes were definitely something I will make again. For the potatoes I peeled and chopped 2 russet potatoes, placed them on a baking sheet, then drizzled them with olive oil and about 1/4 packet of ranch dressing mix. I stirred them around then baked them at 375 degrees for about 20 minutes, stirring occasionally. Just check them to see if you need to bake them longer. They should be lightly crisp on the outside and soft on the inside.

Thursday, December 6, 2012

Meal for a Friend

Have you ever been through something like illness, the death of someone you love, or maybe something a little more exciting but still stressful like the arrival of a new baby or a move? I and/or my family have experienced all of the above throughout our lives, and one of the things I have appreciated most during these times is when our friends have organized meals for us. It is so nice to have one less thing to worry about! 

I have both given and received meals over the years, and from these experiences, I have come up with a few tips (some of these are my own ideas, and others I have picked up from friends:

  • Think about how your meal will taste if it sits for awhile or has to be reheated. In most cases, your friend will not be eating it the moment you walk into their home. So although a steak sounds like a great treat, it might not taste so good after sitting for an hour or especially if it has to go in the microwave later. 
  • Ask your friends about food allergies, dietary restrictions, and personal preference. They might be vegetarian or have a peanut allergy (as a mother of a child with a peanut allergy, this is very important to me), or they may not like mushrooms. You don't need to waste your time and theirs bringing them something they cannot or would rather not eat. 
  • Not a cook? Don't let this stop you from helping a friend. Ask them what their favorite take out restaurant is and what they usually order there. Or pick up a prepared dinner from a nice grocery store like Whole Foods. They will appreciate this more than you think!
  • If you are the one organizing the meals for a friend in need, try out a website like Take Them a Meal. This website (and others like it) are great for this. You can set up a schedule, include the preferences of the friend receiving the meals, their address and phone number, so that they can be contacted about times, etc. Then you can email it out to everyone (this is great for churches, playgroups, and co-workers), and each person can sign up for a meal on the day that works best for them. They type in the meal they plan on bringing, and that way your friend will not receive 10 lasagnas in a row (I love lasagna, but it can get old).
  • Bring all food in disposable containers or other containers your friend can keep. It's a pain to have to clean everyone's casserole dishes, remember which one belongs to which person, then bring it back to them. 
  • If they have children, consider including a few goodies for them, plus some food you know they will enjoy like fruit. 
  • Make double of everything, then you will have dinner ready for your family too. 
  • Give your friend some fresh flowers or a little gift like a candle along with the meal.
  • Some of my favorite meals to bring friends are tacos, fajitas, enchiladas (you can do everything ahead of time except the baking so that they can just put it in the oven when it's most convenient for them), chili or soups, pulled pork, and brisket.
A friend of mine recently gave birth to a sweet baby boy, so having received meals myself, I was happy to make one for she and her family.  I decided to do tacos this time. They are so easy, and one of my favorite meals. It's comfort food to me (I grew up in Texas, so Mexican food is comfort food there). I was always so happy when my mom made tacos, it made my night! It's one of the things she taught me to cook too, and I loved to help her with it, so it's one of the first meals I felt comfortable making on my own. Tacos are great for bringing to someone, because it tastes just as good reheated as it does fresh. I just buy a packet of taco seasoning at the store and follow the directions on it. My favorite is Lawry's brand, it's what my mom always used. It's usually around $1 per packet, but is often on sale for much less, so I try to stock up on it then and keep it on hand. You can use ground beef or ground turkey. Both are great, the turkey has less fat, but is usually more expensive. Or for vegetarians you could do a mixture of black beans and chopped or shredded veggies. Last night I used beef.


I made my homemade salsa to include with the meal. I have shared the recipe before, but I will do it again. If you have not tried making your own salsa before, you need to do it. It is so easy, less expensive, and delicious! Plus you can adjust the recipe to suit your own tastes. Here is the recipe for my salsa:

  • 1 28 oz. can whole peeled tomatoes, drained
  • 2 jalapenos, seeds and stems removed
  • 1 serrano pepper, seeds and stems removed
  • 3-5 roasted green chiles, seeds and stems removed (if you don't have fresh ones, you can find canned green chiles in most stores)
  • 1/2 bunch of fresh cilantro
  • 1-2 garlic cloves, pressed
  • Dash of salt (remember, the chips are usually salted, so taste with a chip to see how much you'll need)
  • Dash of cumin
Combine all ingredients in a food processor or blender. Pulse a few times or until you reach desired consistency. This usually stays fresh in the fridge for about a week or more. This recipe will make what I consider to be a medium spicy salsa. To make yours hotter or more mild, add or remove peppers. Serrano peppers are pretty spicy, so if you like more mild salsa, try making it without those. Also, green chiles can be purchased mild, medium, or hot. I use the hot ones. You could also add onion, I just prefer mine without.

I put the salsa in a mason jar. I also made my black bean and corn salsa which is: 1 can of black beans rinsed and drained, 1 can of corn, drained, 1 can of diced tomatoes and green chiles, drained and 1-2 chopped avocados. Then add a little salt to taste. I put all of the ingredients in a mason jar as well, without the avocado so that it didn't turn brown. So I just gave her an avocado to cut up when they were ready for it.
Above is a picture of everything I brought to my friend. The taco meat is in the plastic container, the salsas in mason jars, cheese to top the tacos in a zip top bag, an avocado, a box of taco shells, a bag of tortilla chips, and some bananas, cuties, and chocolate bunny grahams for her 3 year old to enjoy. This meal was easy to put together ahead of time and is a nice change from the usual pot roast or lasagna most people like to bring. And I made enough for us to enjoy for dinner as well.

Delicioso!

Easy Pasta Sauce


Monday I was inspired by the Pioneer Woman to make her baked ziti. But by the time dinner rolled around, I wasn't sure that I wanted something quite that heavy with all of the cheese (truth is, I had way too much leftover pizza for lunch, so the baked ziti wasn't sounding so great). So, I decided to use much of the same ingredients (and a few different ones) to make my own pasta sauce to go with the penne I had at home.

I browned about 1/2 pound of hot Italian sausage (you may want to drain some of the grease afterward or wipe your pan a little with a paper towel), threw in a small diced onion and a couple of minced garlic cloves, and cooked until they were translucent.
Then I added a 16 oz. can of diced tomatoes and an 8 oz. can of tomato sauce. I added some salt and pepper as well as some Italian seasonings (you can use whatever you have and taste as you go), then let it simmer for a bit. Next I threw in about 8 oz. (half of a box) of cooked penne and tossed it together.
I topped it with a little parmesan cheese and would have added fresh basil, but I didn't have any. This made enough for Josh and I to eat it for dinner and have leftovers for lunch. This is a great easy weeknight meal. If you wanted to save even more time, you could make the sauce ahead of time, then just reheat it and throw in some fresh pasta.

P.S. Please forgive the poor lighting in these pictures. I didn't realize until afterward that I still had my camera on "sunset" mode. Plus, our 1970s house has terrible lighting. So it was a winning combination.